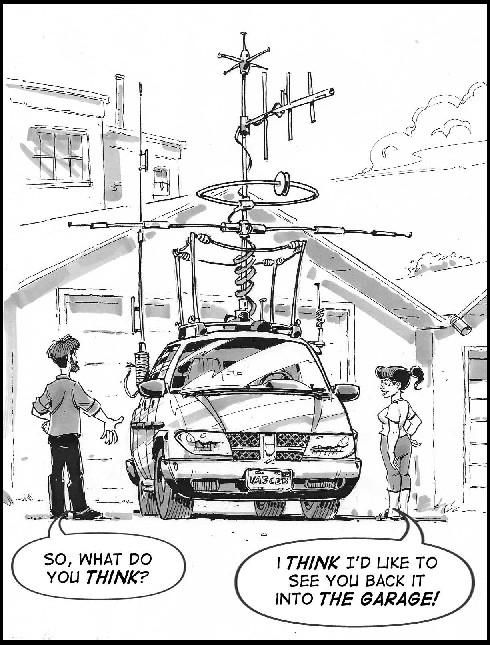
 Both the XYL and my mobile has suffered from a bit of neglect. The XYL was running a TM-D710A fed by a AvMap Geosat 6 GPS. Band A ran APRS and Band B was for communicating with me. APRS always worked without issue but Band B began dropping power on transmit. I had experienced this was another TM-D710A I had which was repaired after a visit to one of Kenwood’s stateside repair facilities. The XYL was never happy about having the AvMap GPS up on the dash. I viewed this as an opportunity for a new radio! She now has the TM-D710G with an integrated GPS.
When I head into the garage, I hop out and bring my antennas down. The XYL makes use of a solution that allows her to remain in the vehicle while entering the garage. The Diamond K9000LRM is a motorized mount that allows her to raise and lower her VHF/UHF antenna from inside the vehicle. We’ve been using this solution for about ten years and have gotten about three years of use out of the unit. The motor had quit and also needed to be replaced, which was an easy swap.
In my mobile I am also running a TM-D710A, but fed by the older AvMap Geosat 5 GPS. The Geosat 5 began showing its age by having problems booting up. It started, but often took a few minutes to “warm up”. With the XYL’s Geosat 6 available, I swapped out the Geosat 5 and am good to go.
It was also time to pull and clean up the HF rig. The setup is straight forward: an ICOM IC-706MKIIG, Tarheel 100A-HP screwdriver antenna, controlled by a TurboTuner. I can’t say enough about the IC-706MKIIG. Its straight forward to use and works. I’ve added the fan mod to address some ham’s concerns of the IC-706IIG’s heat. The IC-706 and the TurboTuner are mounted in an iPortable case, all powered by a auxiliary battery. The aux battery is charged by the main battery and allows me to not worry about running down the main battery.
I detached all the cables and pulled the case. Once on the bench, I pulled everything off and gave it a good cleaning. Next, I got to add my Christmas present to the mix: the N8XJK Super Booster. I had seen the N8XJK Super Booster advertised in the back of QST ever since I can remember, but sold by TG Electronics. Apparently Westmountain Radio is now selling them. What the device does is makes sure the IC-706 is supplied with a consistent 13.8 volts. Operating mobile, providing that consistent voltage can be crucial in maintaining a solid signal on transmit. The N8XJK Super Booster works as advertised, regardless of if the vehicle is running or not.
This morning on a short trip I put the updated setup to the test. First I did a quick check in with the Texas Traffic Net and got a nice report from Ed, K5KBV in Amarillo. Next I was able to work a guest op at W1AW, breaking through a mild pileup. So far, so good with HF setup.
Tag: IC-706
HF Email From The Mobile?
Last summer when we were camping in the national parks, there were many campsites where we had no cell phone service. I am not complaining about that, but our work around to communicate back home to the XYL often required a trip to the pay phone (sometimes hard to find). I thought about perhaps using APRS’s capability of relaying short pieces of text as emails. Part of the problem is that there are many areas of the parks that don’t have any APRS digipeater coverage (Glacier and Yellowstone National Parks for example). How to get a message through?
Then I remembered my MARS station (AEN5AC) in Iraq. I was using an ICOM IC-7000 and an SCS PTC-IIusb modem to pass MARSGRAMS from my location north of Baghdad to another station at the US embassy in Qatar. The pairing worked quite well and I was consistently able to connect and pass traffic using PACTOR 3 at the 1400 baud rate. Could I use a similar setup to provide an HF email option while camping this summer?
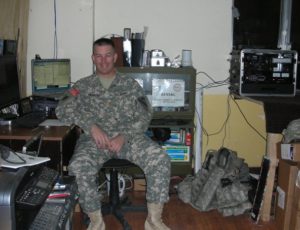
I dug out my SCS PTC-IIusb modem. I had not used it since shutting down the MARS station in June of 2008. Everything was still in the box. To include the cables necessary to interface the modem with an ICOM IC-706MKIIG… the same rig I use for HF mobile.
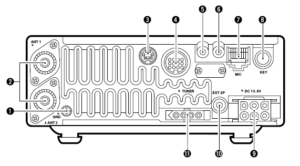
I pulled out my spare IC-706MKIIG. Coming back to Kansas from Field Day in California back in 2009, my IC-706MKIIG quit on me. I ended up buying a second at the HRO in Denver and sent the broke one to ICOM. ICOM fixed it and returned it. I kept it in the box and it went back on the shelf. I did order a 6 pin Molex connector with powerpoles to allow for an easy power connection (#9). I connected the two cables from the modem to the rig. Once cable is for the data and plugs into the 706’s 13 pin accessory connection (#4). The other cable connects to the 706’s CI-V interface (#6) to have the radio change frequencies based on what station is being contacted.
I had the basic hardware of a HF email station, except for a computer. I would need one that would function out of the vehicle. This would probably require a laptop. I also decided for the ease of simplicity that the computer should be Windows driven (instead of Linux). Gasp! The bottom line is that the software and drivers required to send email via HF and use the SCS PTC-IIusb modem is Windows based. The answer ended up being an Dell XPS 15.

Using a Windows based computer helped me with a number of summer travel tasks that could not be accomplished by my small Linux laptop:
(1) Run the software required for HF email (more on Winlink and Airmail later)
(2) Run ARRL’s TravelPlus for Repeaters
(3) Run RT Systems radio programming software for my TM-D710A
(4) Run RT Systems radio programming software for my VX-8RGs
(5) Read the SD card from my Canon digital camera
Interestingly enough, the new laptop does not have a CD/DVD drive nor an RJ-45 connection for a LAN cable. Neither of these have been a show stopper yet.
ARRL’s TravelPlus for Repeaters
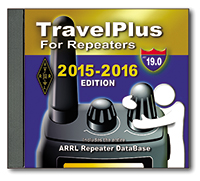 I had purchased TravelPlus for Repeaters with the intent of installing it on my existing Linux laptop and running it under a VirtualBox Windows session (similar to how I run iTunes on my Linux laptop). However the software failed to install. I tried troubleshooting and looking at suggested fixes found on the forum sites but still had no luck. I tried installing TravelPlus using WINE. It installed but would not run as well.
Dell XPS 15 to the rescue. As the laptop does not have a CD/DVD drive, I copied the drive onto network storage. I then was able to install TravelPlus over the network and it is working without issue.
RT Systems Programming Software
The RT Systems programming software works fine under a VirtualBox Windows session. As I was moving all my vehicle related radio/computer tasks to the new Windows laptop, I attempted to install the programming software for the TM-D710A (used for beaconing the location of my vehicle and talking on VHF/UHF). Following a similar procedure that worked for TravelPlus, I copied the programming software from the install disks to a network drive. The software installation for the TM-D710A worked without a hitch. The software for the VX-8RGs (HTs we use for around camp and hiking) failed to load. The error said that I must use the original disk to install. A big challenge when the laptop doesn’t have a CD/DVD drive. The work around is that you find another Windows computer with a CD drive, load the software CD, then back on the driveless laptop, map the CD drive (like you would map a network drive). That worked and I was able to install the programing software for the VX-8GR.
HF Email Software
There are two main choices for software to allow for HF email: RMS Express and Airmail. I installed both. Airmail was the same program I used in Iraq and it offered easy configuration with the IC-706MKIIG and the SCS PTC-IIusb.
I now had all my equipment for a test run setup in my basement hamshack: spare IC-706MKIIG, SCS PTC-IIusb, and the Dell XPS 15 with Airmail. I connected the IC-706MKIIG to my Elecraft tuner and used my existing G5RV antenna. Airmail configures easily. The software has a list of stations offering mailbox services that can be viewed on a propagation chart by frequency and distance. Based on time of day, I selected a station in Texas that offered a 40M PACTOR 3 connection. Airmail allows me to click on the frequency in the propagation chart which then changes the dial frequency of the radio. After listening to see if there were any ongoing connections, I initiated contact. The modem lights flashed and the rig clicked between transmit and receive. The connection was made and I was able to send a test email as well as a position report.
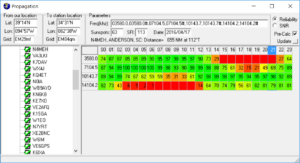
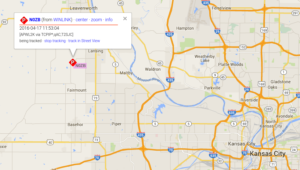
Success! The position reports that go into the Winlink system are copied over into APRS. Now, even if I am not able to reach a digipeater with my VHF APRS beacon, I can send a position report over HF to let the XYL know where we are.
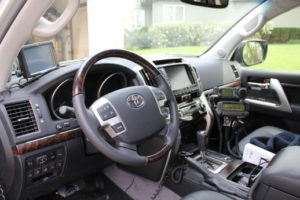
I then thought about the steps I would have to take of transitioning my IC-706MKIIG configured for HF mobile to be ready to work with the PTC-IIusb to send email. As the remote head is located up near the drivers seat, this would present problems with being able to observe the modem, laptop, and radio control head all at the same time.
What if I just dedicated the spare IC-706MKIIG rig to the task of HF email? It would save me time and bother in pulling and plugging cables. It would also give the camping option of being able to operate HF from outside the vehicle.
Using an additional iPortable box, I rack mounted the spare IC-706MKIIG and the SCS PTC-IIusb. Now I will have a spare HF rig with me, so if one goes out I will still be operational. I also attached the Tarheel screwdriver antenna’s rocker switch to raise and lower the antenna on the side of the box. During normal HF mobile operations, the TurboTuner (connected to the other IC-706’s tuner connection and CI-V connection) manages achieving a correct match between the operating frequency and the screwdriver antenna.
I only have the one TurboTuner. The TurboTuner requires a connection to the CI-V. So does the SCS PTC-IIusb. My solution was to leave the TurboTuner alone. Instead, using the rocker switch, I can manually tune the antenna while visually observing the 706’s SWR meter.
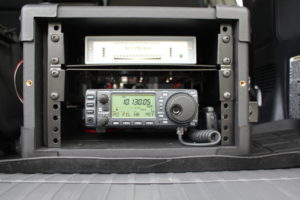
To transition between using the 706 dedicated to HF mobile to the 706 now dedicated to HF email, I have to do the following:
(1) disconnect the antenna feedline from the TurboTuner
(2) disconnect the control line that goes from the TurboTuner to the Tarheel screwdriver antenna
(3) connect the antenna feedline directly to the HF email 706
(4) connect the control line to the rocker switch
(5) connect the laptop to the SCS PTC-IIusb via a USB cable
(6) connect the iPortable’s powerpole connection to the junction box in the back of the vehicle
… then I am ready to go. The iPortable box rests nicely on the vehicle’s tailgate, next to the laptop. All at about lawn chair height. Not only can I use this setup to send email via HF, but I can also use it for causal National Parks On The Air contacts as well.
What’s left to do:
(1) Constant cooling fan modification for both IC-706s (see AD5X’s article)
(2) An extended control cable for the Tarheel screwdriver antenna. This will allow me to further remote away from the vehicle, but still use the antenna.
(3) A length of antenna feedline for remoting.
(4) A length of powerpole-ready powerline to attach to either the travel trailer battery or directly to the spare vehicle battery… again for remoting away from the vehicle.
(5) I have a set of Heil headsets that worked with my IC-7000. I think if I get the AD-1ICM, I should be able to use them with the 706.
(6) A Heil HS-2 hand PTT switch to use with the headset.
Mobile Install
I have taken my HF mobile install through a number of different iterations (the constant being the rig: an Icom IC-706MKIIG). Today I hope that I have finally reached a lasting, workable setup. Here is a quick re-cap of my trials and tribulations:
First attempt (2007):
What this install lacked in experience, it made up in effort. The successes were routing the powerline and the feedline. The antenna system was a different story. My combination of Hustler and Hamstick antennas (along with the unfortunate choice of putting an Icom AT-180 autotuner in the mix) met with mixed success. I did make contacts and enjoyed the mobiling. The rig itself was placed under the passenger seat. Placed side by side with my TM-D710A left very little room and little clearance between the seat and the floor. I came to realize that my 2005 Toyota Tundra lacked any real great locations to stash a rig. The drivers seat (no way), behind the back seat (nope), under the back seat (not going to happen).
Tarheel Model 75A and the stake pocket mount (2008):
I have not regreted going with the Tarheel Model 75A. I finally figure out that using an autotuner was a non-starter and a screwdriver offered a great solution. The stake pocket mount was a mixed success. The way the pocket was always had the antenna sticking up at a funny angle. It also did not seem very secure. I still made lots of contacts and had lots of fun.
Switched to MT-1(S) mount (2009):
Switching to the MT-1(S) mount did a lot to improve my operations. By having the antenna mounted right to the side of the bed, my ground (… and other half of the antenna) was greatly improved.

Using the iPortable (2009-2012):
I don’t usaully have a passenger in the front seat – just two kids in the back. But having a heavy weight passenger in the front seat was a no-go for IC-706 in the all too cramped location under the seat. The iPortable setup allowed me to consolidate the IC-706MKII and the TurboTuner in one spot. No more messy nest of wires. But the iPortable offered somewhat of an obstacle to the kids in the back seat.
Current (…and final?) install (2013):
I have had the TM-D710A installed for a while. The AVMAP makes a good pairing and you can find my location via APRS here.
Now the iPortable is in the large tool box mounted to the bed of the pickup.
The big task was to reroute all the cables: an extension to the powerline, pulling out the feedline, and moving the control cable for the Tarheel antenna. The IC-706 includes the AD5X fan modification.

I had to drill a hole on either side of tool box to route the cables in and out. So far, so good – everything works and I am getting a full 100 watts out on every band.
I did forget to run a line for a CW paddle… that is on the To Do List.
There are also a few additional improvements I would like to make.
– 12v booster to 13.8v
– Extra 12v battery
– amplifier? 🙂
Armed Forces Day Crossband Test

The AFD Crossband Test has two components to it. The first is to receive a message from the Secretary of Defense which is transmitted in various digital modes from different military stations during the day. The second part of the Test is to make contact with the military stations with the military stations operating in their band and the amateurs in their band (hence the term “Crossband”).
For the Secretary of Defense message I hooked my Rigblaster Plug & Play to my IC-706MKIIG and brought my laptop into the truck (which has fldigi installed). The Rigblaster worked like a charm and I was able to copy the SECDEF’s message from WAR (at The Pentagon), AAZ (Fort Huachuca, AZ), and AIR-2 (New York). All these transmissions were in RTTY, which fldigi was able to read without issue. Now I need to print out copies of the messages I copied (which are the same, except the header information which reflects what station was transmitting the message) and send them in to the corresponding station. In return, I believe, I’ll receive a certificate from the SECDEF (suitable for framing, I’m sure).
The crossband contacts caused me to take a crash course in split frequency operations for my IC-706MKIIG. Fortunately I had my Nifty “Cliff Notes” version of the manual and was able to figure it out pretty quick. Although the actual execution took a bit of time to get down. First, obviously, I had to hear the station calling. MARS HQ publishes ahead of time a list of each station and the frequency that they will transmit from. I built a spreadsheet that allowed me to sort by frequency which made it easier to search for the transmitting station. The searching was done in the IC-706MKIIG’s VFO A. Once I found the station, I had to listen for them to announce the amateur frequency they were listening to… which most stations did periodically. Once I got their listening frequency, I flipped over to VFO B, dialed up the frequency, tuned the Tarheel screwdriver antenna, flipped back to VFO A, then hit the Split function, and waited for a chance to call. In the end, I was successful in contacting five different stations: WAR (at The Pentagon), NWKJ (located on the USS Yorktown, Charleston, SC), NMN0CQQ (located on the USS Midway, San Diego, CA), AAZ (good ol’ Fort Huachuca, AZ), and NWVC (a Navy MARS station in Indiana). For these contacts I get to send in my QSL card and hope for a response.
None of this was exotic DX but it was fun and exciting… and a bit challenging trying to do it all from inside my Toyota Tundra. I hope I am able to particpate again next year.
$3 AIR-2 AIR-2 MESSAGE FOLLOWS
RYRYRYRYRYRYRYRYRYRYRYRYRYRY
RYRYRYRYRYRYRYRYRYRYRYRYRYRYDE AIR-2 AIR-2 MESSAGE FOLLOWS
SECRETARY OF DEFENSE
ARMED FORCES DAY 2012 MESSAGE
TO AMATEUR RADIO AND
MILITARY AUXILIARY RADIO SYSTEM
OPERATORSQUOTE
FOR THE PAST SIXTY-THREE YEARS, OUR NATION HAS RECOGNIZED
THE DISTINGUISHED GLOBAL SERVICE OF OUR UNITED STATES
MILITARY DURING THE ANNUAL ARMED FORCES DAY CELEBRATION.AMATEUR RADIO AND MILITARY AUXILIARY RADIO SYSTEM OPERATORS
PROVIDE ESSENTIAL CONTINGENCY COMMUNICATIONS TO RELIABLY SUPPORT
OUR NATIONS MILITARY AND GOVERNMENT AGENCIES. YOUR SUPPORT OF
COMMUNICATIONS BETWEEN DEPLOYED SOLDIERS, SAILORS, AIRMEN,
MARINES, SUPPORTING CIVILIANS, AND THEIR FAMILIES IS DEEPLY
APPRECIATED.ON BEHALF OF ALL UNIFORMED SERVICES, I EXTEND MY SINCEREST
APPRECIATIMN FOR YOUR HARD WORK, SELFLESS DEDICATION, AND
VITAL SERVICE TO OUR GREAT NATION. WELL DONE!/S/ LEON E. PANETTA
SECRETARY OF DEFENSE
UNQUOTE
APPROVED FOR TRANSMISSION,
DE AIR-2 AIR-2
SK
On The Road Again
When I left for Korea, I had to pull out the HF installation on my truck… as the truck was staying in Kansas and I was not. Pulling out the rig and tuner was easy. The Tarheel antenna was also fairly simple. A disconnect at the base and then I coiled up the feedline and the cable that powers the screwdriver so they would be mostly out of the elements.
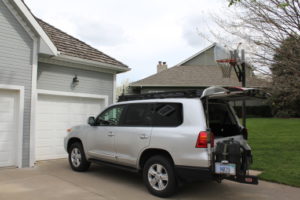
I returned back to Kansas last June but did not reinstall my HF setup in the truck. My only real modification was swapping out my VHF/UHF antenna with a fold-over. The new house afords me the opportunity to park in the garage(!) but rather than unscrewing the antenna every time I enter the garage, now I just have to pull it down. Works great.
My assignment here in Kansas has me traveling quite a bit and this week I am headed up to Wisconsin. I have only driven through Wisconsin once so instead of flying, I am going to make the 9 hour drive. This had me thinking that if I am on the road for 9 hours, I need my HF rig. So today I put the radio back in and reattached the Tarheel antenna.
Everything was set – I fired up the rig and heard the Turbo Tunner beep that it was on and ready. I hit the 706’s tuner button but the screwdriver failed to turn. Troubleshooting time. I took the base of the antenna down to the bench. Then I dug out the original rocker switch that came with the Tarheel. I hooked it up to the bench power supply and then hit the switch. Nothing. After a bit of jiggeling and wiggeling, the screwdriver engaged. I guess the almost two year siesta had taken a bit of a toll.
After a test drive today, it appears as if the mobile HF rig is working FB!… one QSO with North Carolina and another with Massachusetts. So look for me (AD7MI-9) as I make my way to Fort McCoy, Wisconsin and maybe I will catch you on 20M.
Cleaning up the mobile with iPORTABLE
I have been unhappy with the installation of my IC-706MKIIG and TM-D700A in my 2005 Toyota Tundra. Unlike some of the more recent models, my Tundra has little to no room to squeeze in radios. I have had both radios under the passenger seat, which was a very tight squeeze and also prevented me from easily moving the seat forwards or back. The Turbo Tuner would not fit under the seat and had to be placed on the floor behind it. This really made it difficult to seat anyone in the backseat behind the passenger seat.
Then I saw the field communication stands from iPORTABLE. My plan was to get their smaller stand (without the speaker) and mount the IC-706MKIIG along with the Turbo Tuner inside it.
The iPORTABLE box arrived Friday and this morning I took it down to the workbench.
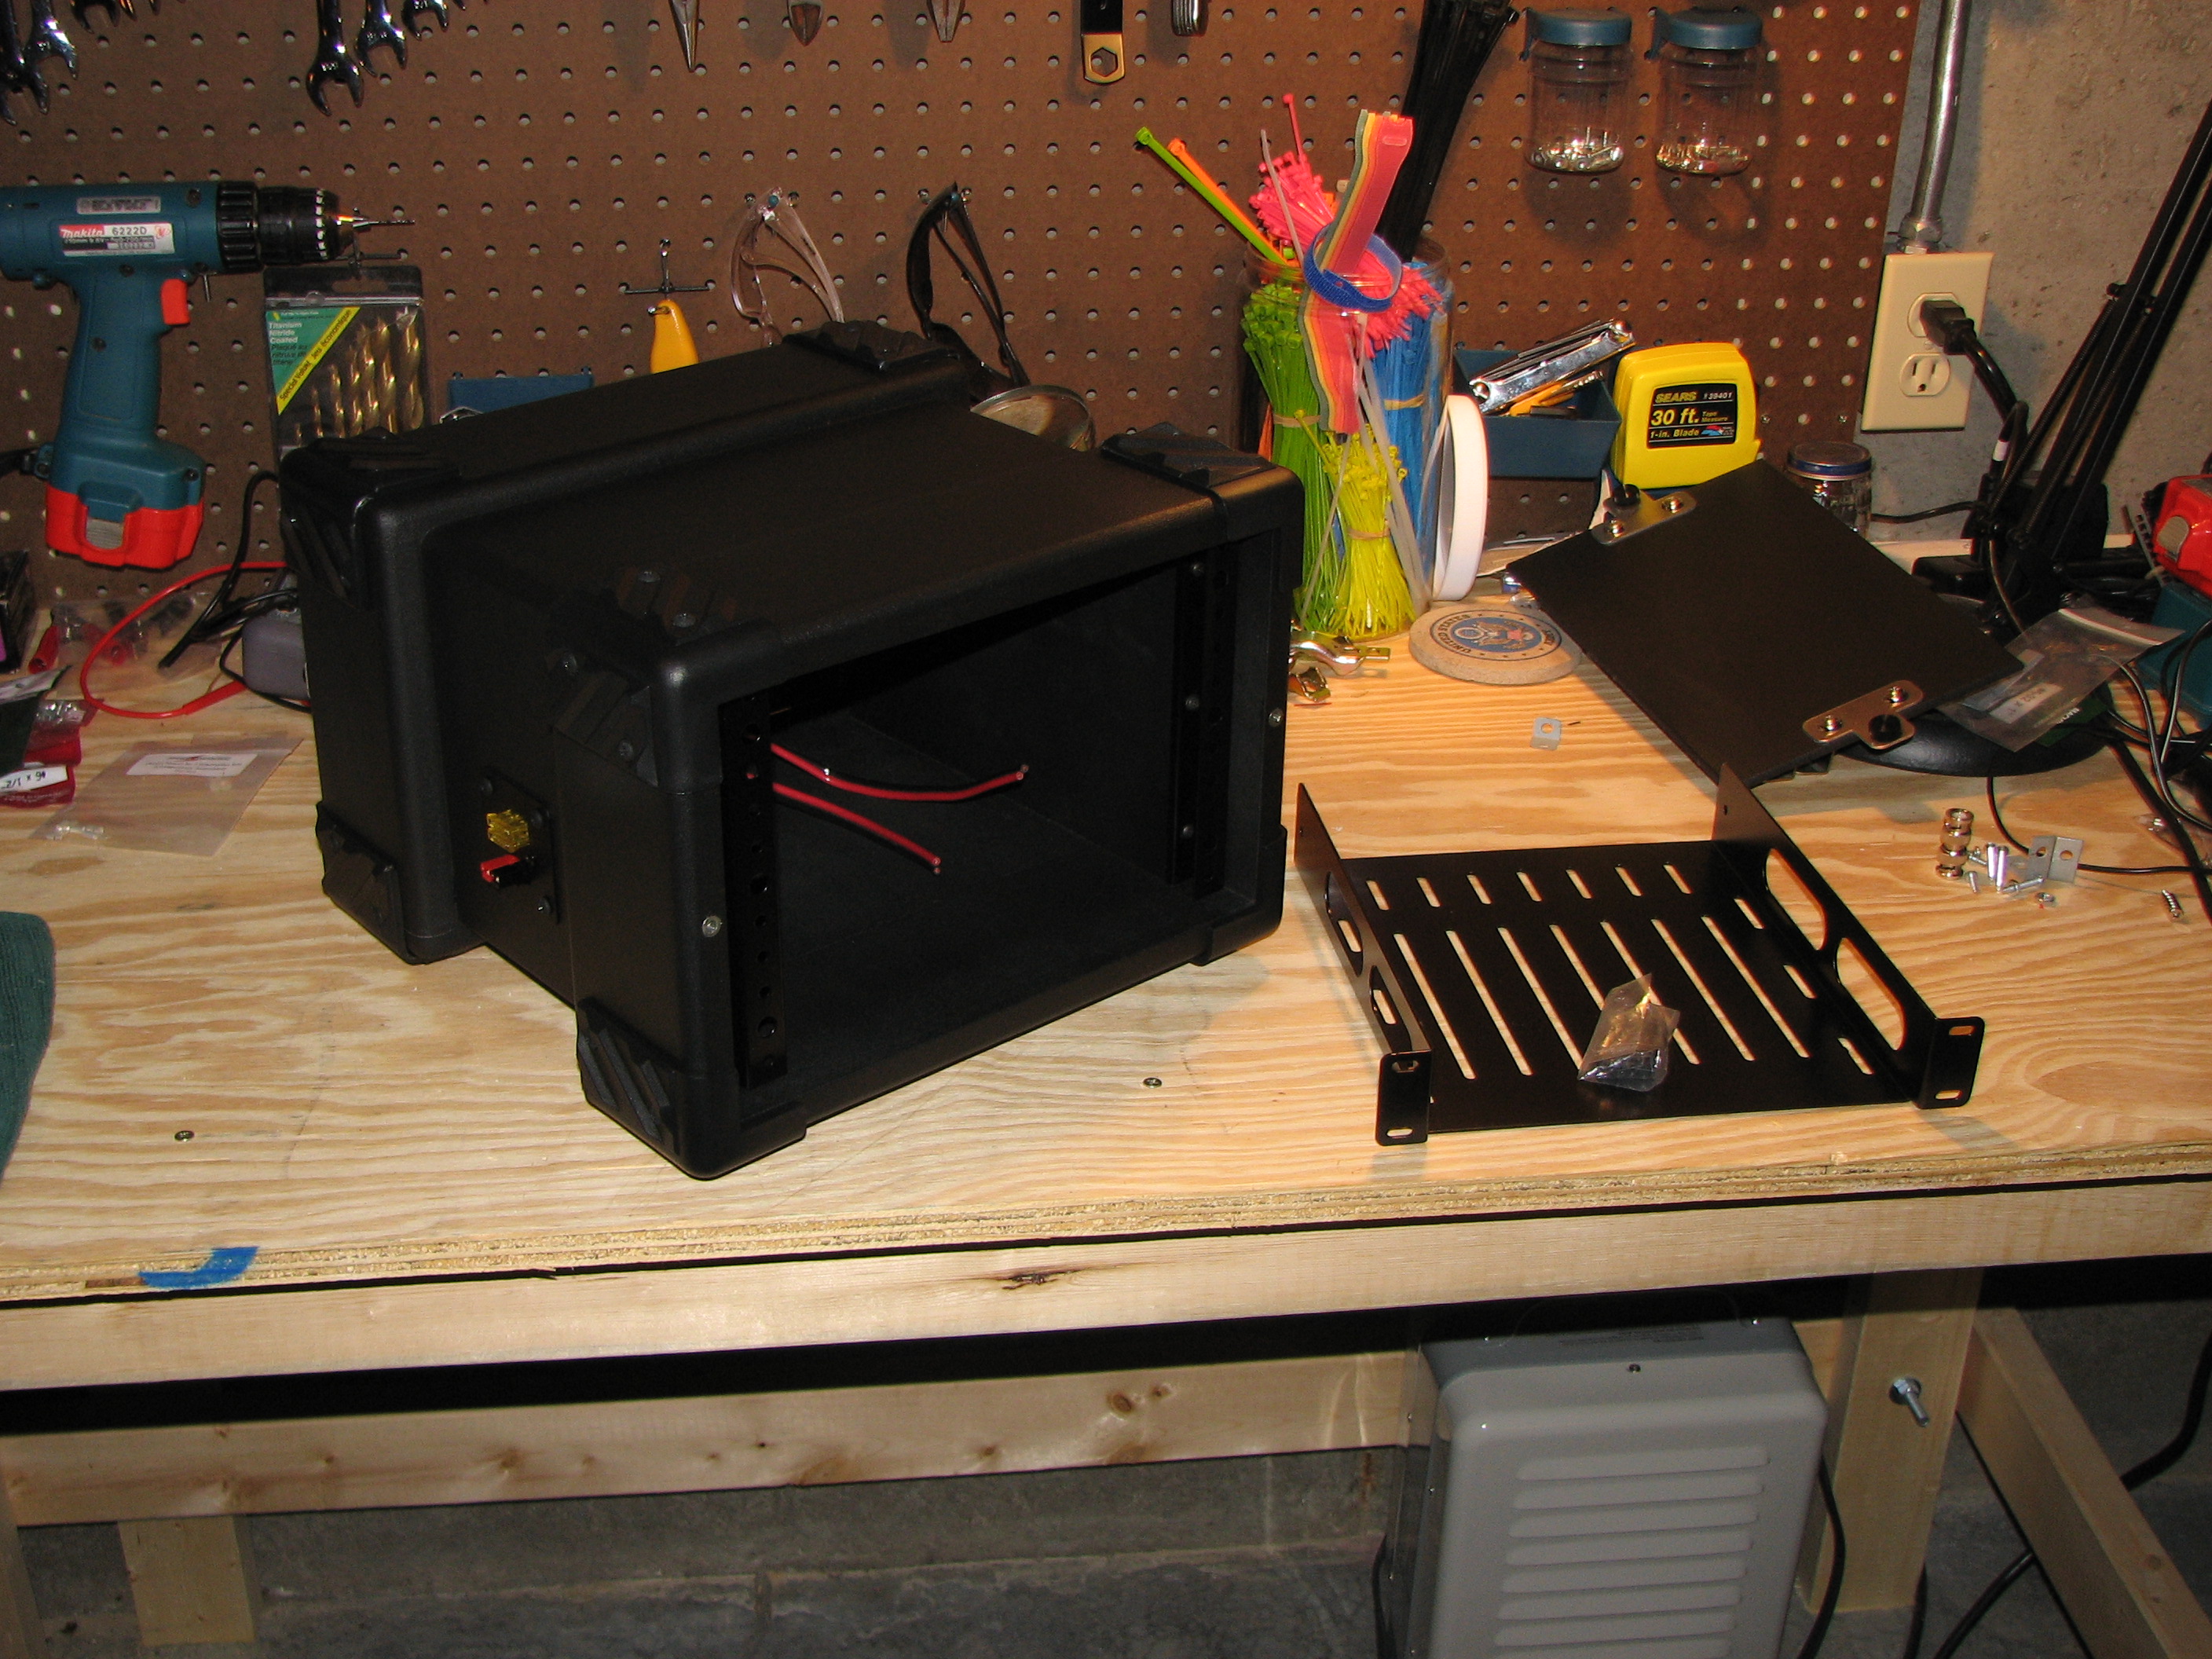
The box came pre-wired with a PowerPole connection on the outside of the box, two 20 amp fused lines inside the box, a rack mountable shelf, and covers for the front and back.
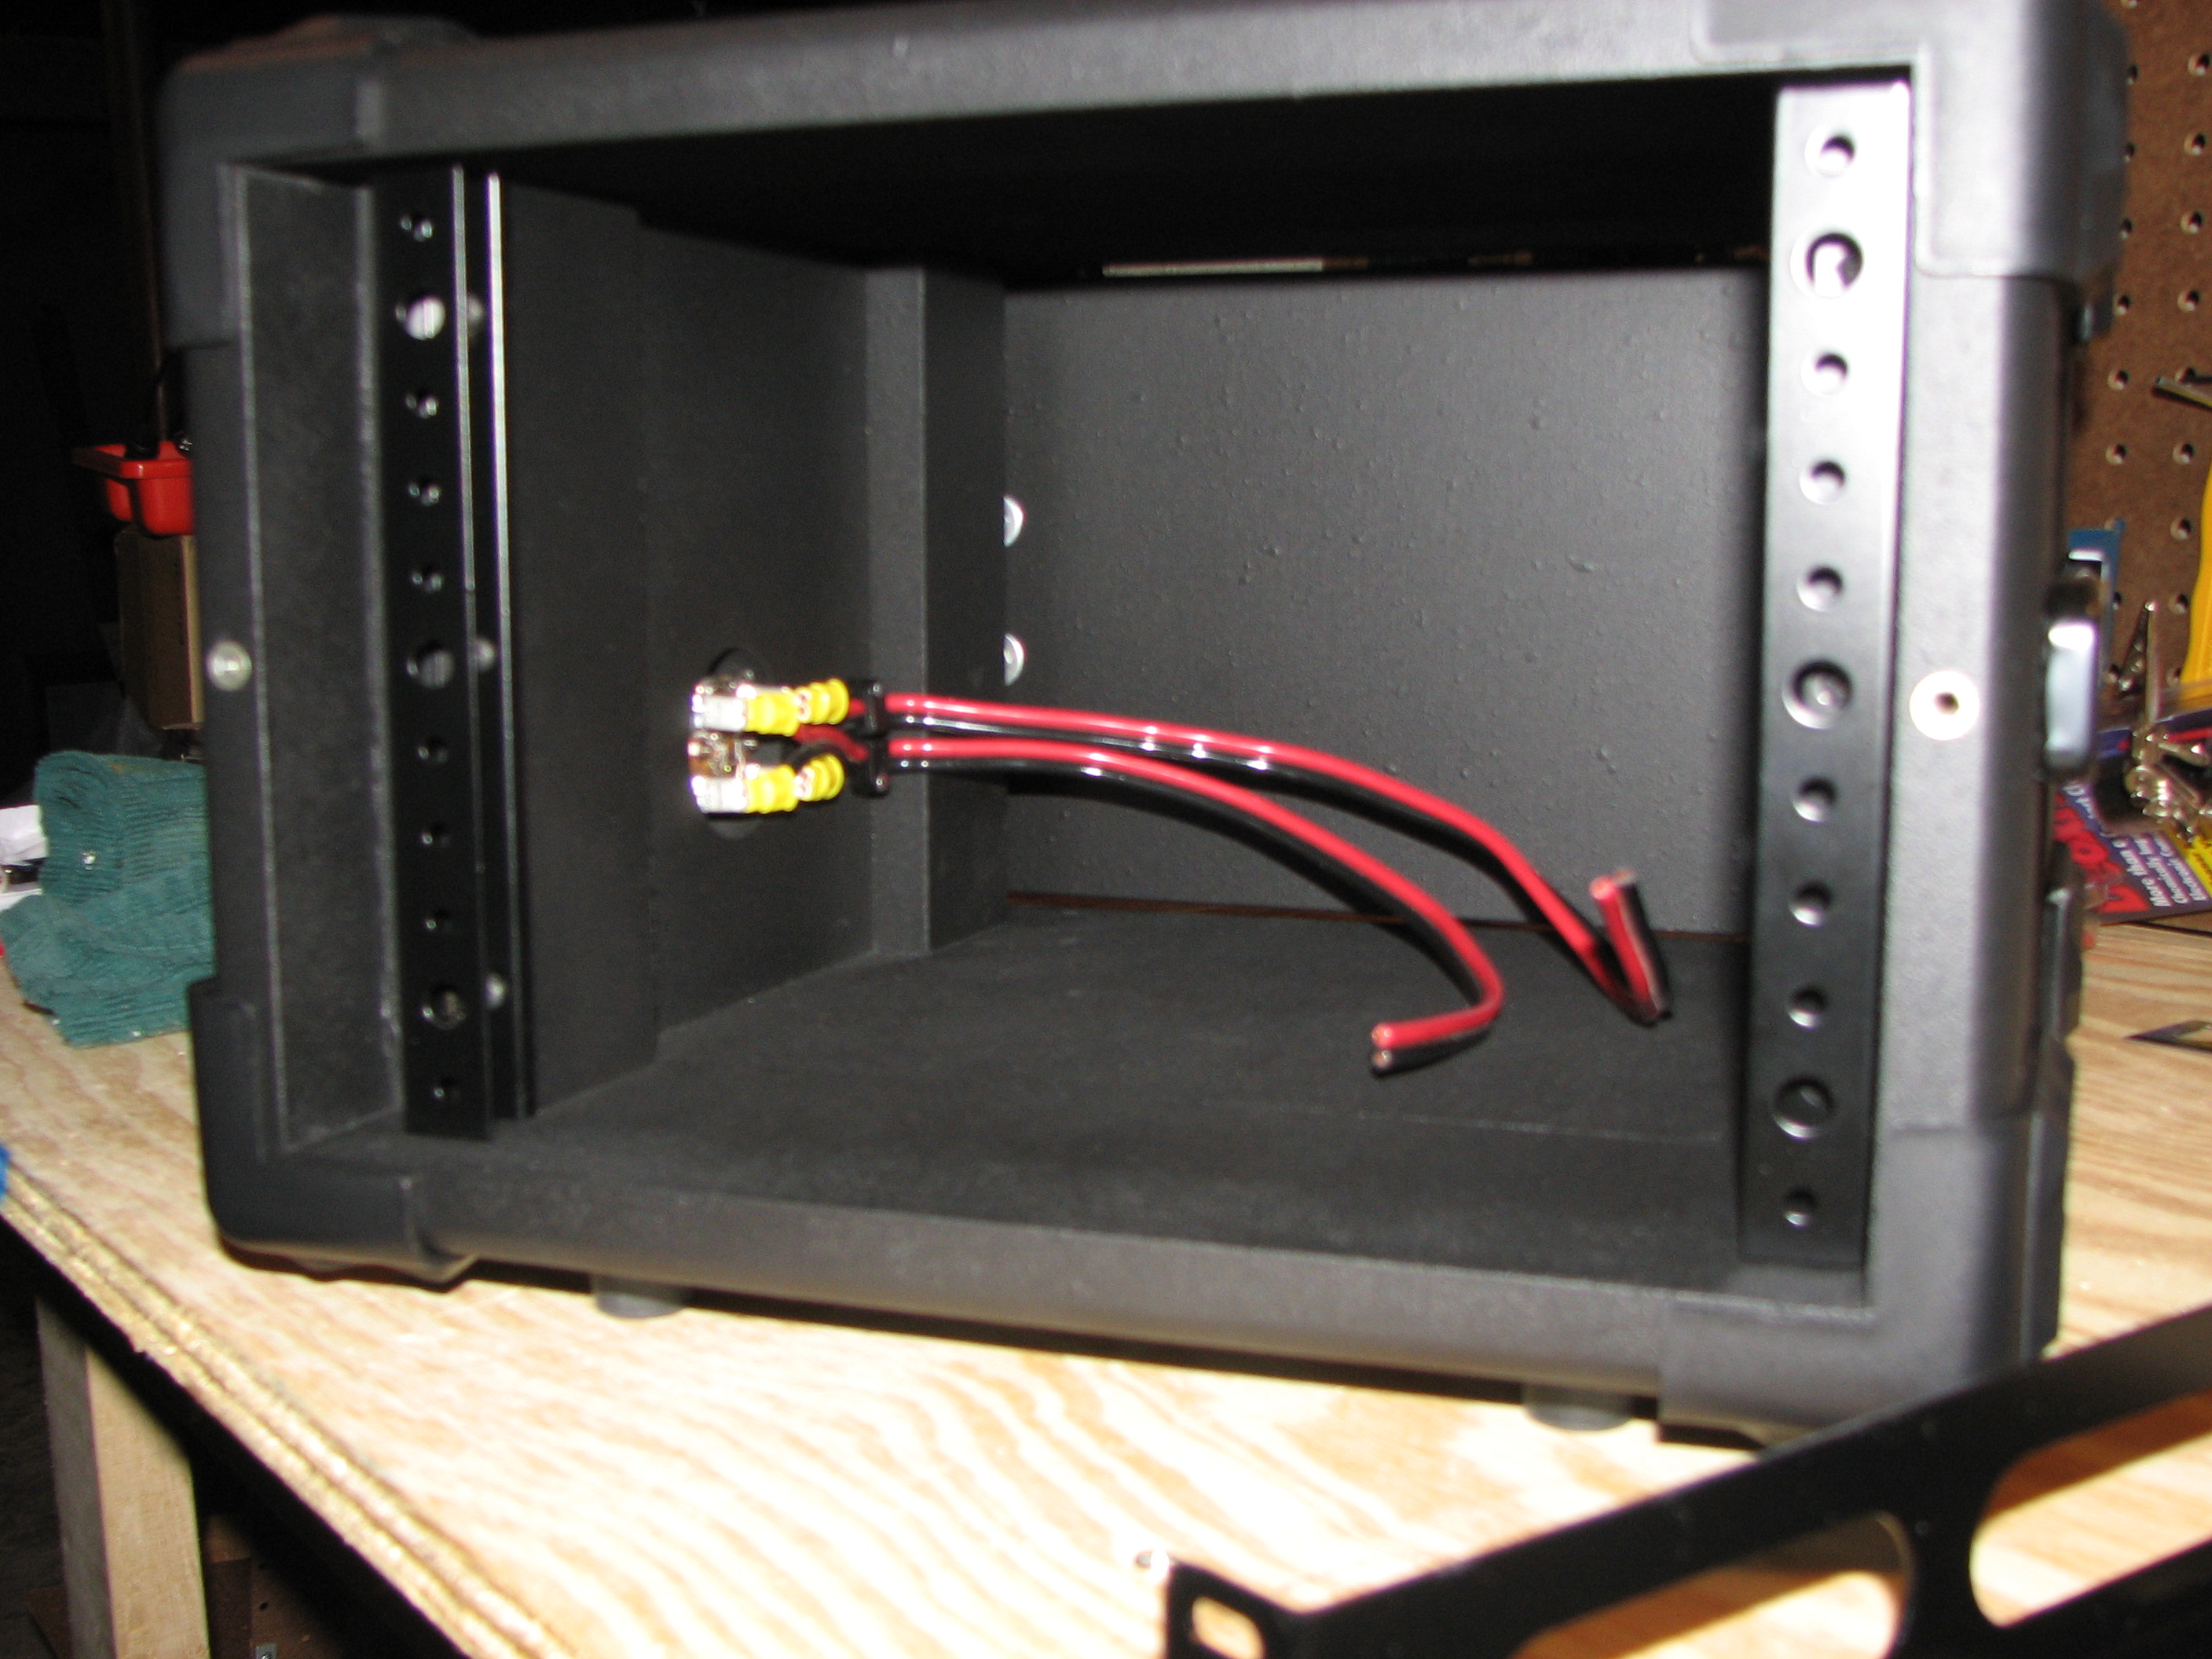
I attached PowerPole connectors to the power lines inside the box and secured the IC-706MKIIG to the shelf.
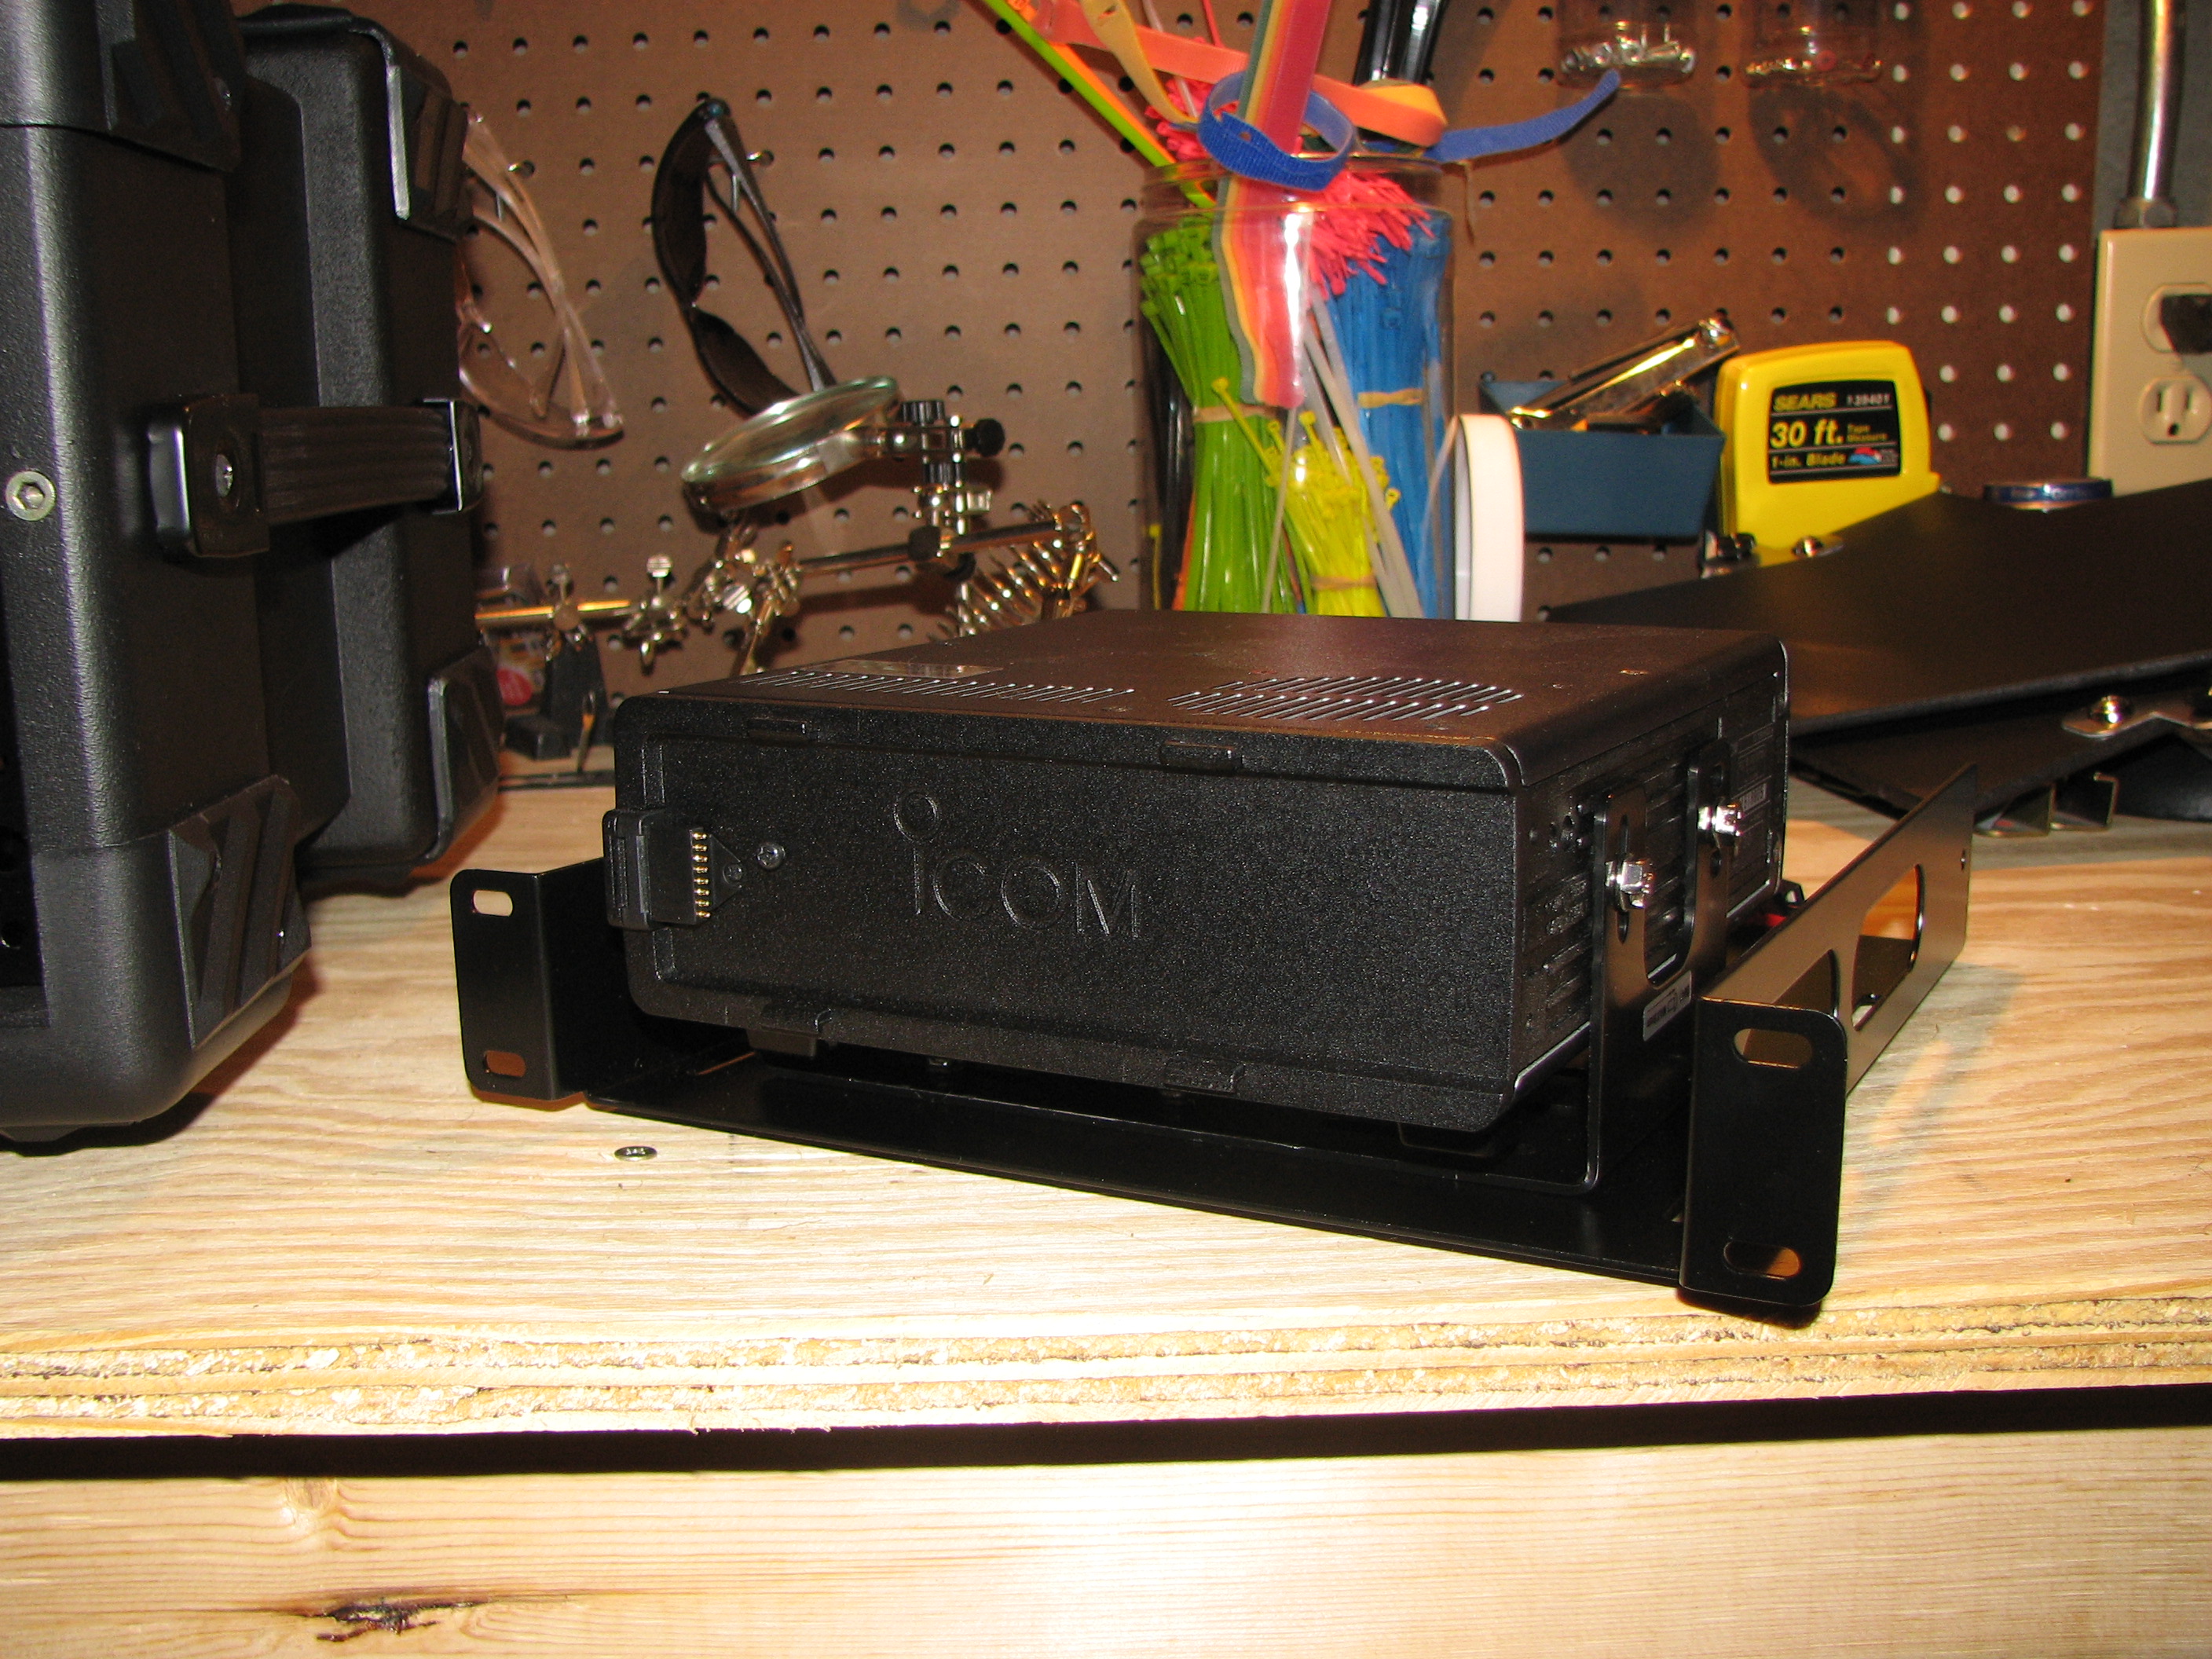
Underneath the shelf, I secured the Turbo Tuner using two zip ties.

Then I mounted the shelf inside the box and connected the cables between the radio and Turbo Tuner. Here is a pic of the front and back:


From here I brought the box out to the truck, attached the remote cable to the front of the IC-706MKIIG and then screwed on the front cover. On the backside, I connected the antenna feedline to the Turbo Tuner, the remote speaker connection, and the control cable for the Turbo Tuner. I left the back cover off the box to allow these cables to run out the rear of the box. I then placed the box behind the passenger seat and connect the external PowerPole connector to the power distribution block under the seat.
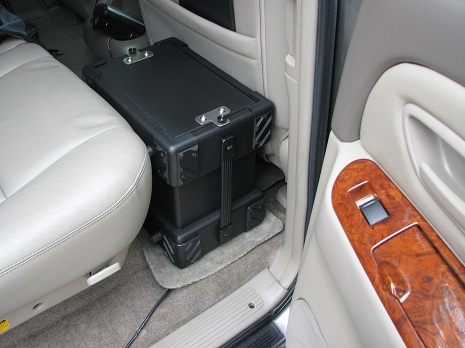

After a test run, everything was working great.

I am pretty happy with my new setup. Now if someone needs to sit in the backseat, I can easily remove the iPORTABLE box. I can also now use this rig for portable operations without much fuss.
Field Day
 My Field Day adventure started on Tuesday, 23 June. I finished the final touched to the eARSIB and then through every possible item I thought I might need (minus a 25 pin to 9 pin cable for a Kantronics KPC-3+ which I will talk about later) in a total of 3 footlockers. I packed up the truck, loaded up the dog and was on the road by 10:30am. There was good APRS coverage on my route along I-80 up until western Nebraska where I encountered an almost 200 mile gap. Once I hit Cheyenne, I was back in APRS coverage. My stop for the first night was Laramie, Wyoming, which I made before sunset.
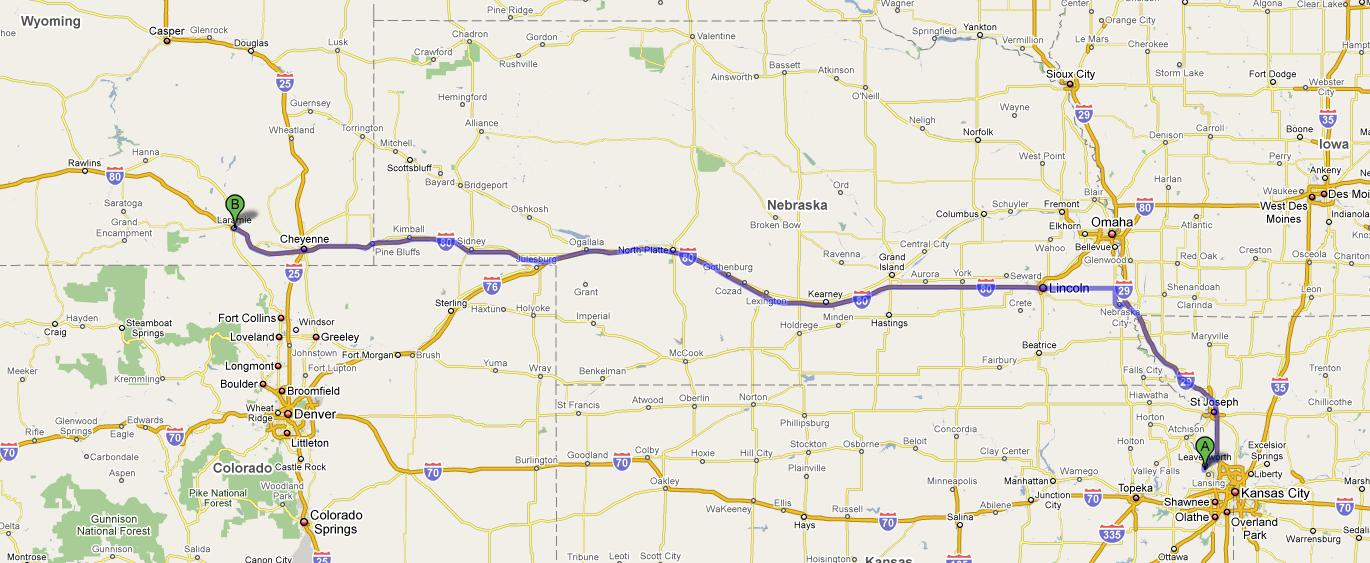
The next day I pushed on west. While in western Wyoming I was able to check into the 40M Sparkle Net (7262 kHz) and talk with Dave, KE0DL, back in Leavenworth, Kansas. I also noticed on my GPS that one of the APRS stations was moving along I-80 the same direction that I was going. I gave a short call on the 2M National Simplex frequency and got a reply. We had both started the drive in Wyoming but parted ways in Salt Lake; he headed south on I-15 to Vegas, I kept west on I-80. I enjoyed the drive through eastern Utah. Park City, Utah is a place I had spent a lot of time skiing about twenty years ago. I’d been there often in the winter, but this was the first time seeing it during the summer.

Traffic was heavy through Salt Lake City and I did my best to make my way around the city as quickly as possible. West of the Great Salt Lake, I had an interesting HF QSO with a gentleman in Southern California who was using an Elecraft K3 with an the diminutive MT-1 antenna. My initial plan was to spend the night in Winnemucca, Nevada but upon arriving discovered they had me on the second floor in a non-pet room. Instead of hauling my footlockers up a flight of stairs I decided to push on to Fernley, Nevada (just east of Reno) where I found a great hotel with a first floor room I could practically back my truck up into. The dog liked it too.
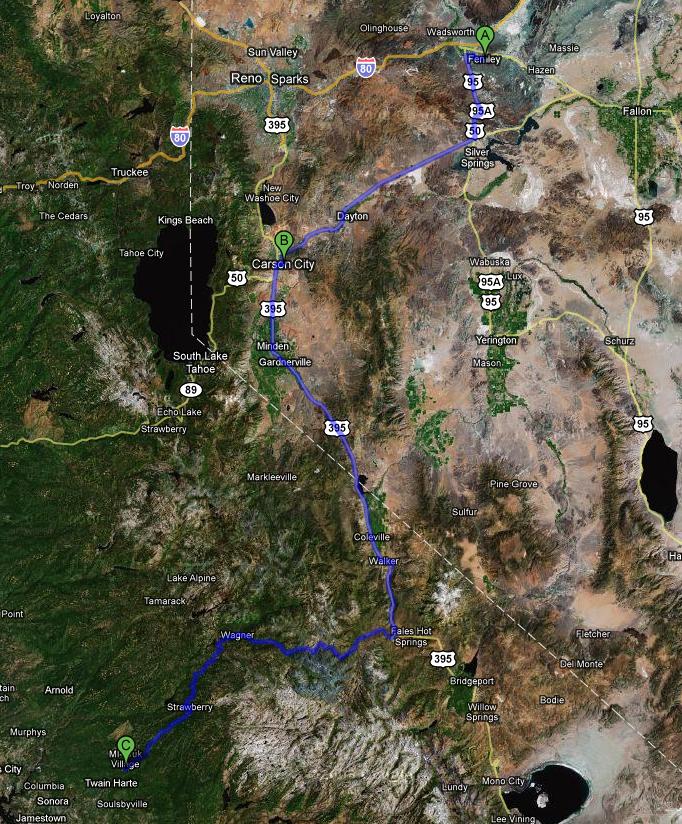
Thursday morning I worked my way up the eastern side of the Sierra Nevadas, listening to a few 40M nets. I reached the Sonora Pass around noon and enjoyed the view. The dog a I hiked up to a nearby plateau and took in the view.
After traveling down the western side of the mountains I was able to raise my dad, KD6EUG, on a repeater near his cabin in Mi-Wuk Village. California Hwy 108 wound its way down from Sonora Pass. The drive was spectacular along the scenic route and traffic was sparse. I rolled down the windows and opened the sun roof to take in gorgeous day. Reaching the cabin in Mi-Wuk, both the dog and I got to strech our legs and rest up. Thursday night we assembled the gear that would become a permanent station at the cabin: an IC-706MKIIG, LDG Z-11 Pro, RIGblaster PnP, IC-208H, all powered by an Icom PS-125. In addition to the radio gear, the station would also integrate a Davis Vantage Pro2 weather station, beaconing the weather data view APRS.

To simplify the APRS setup in the cabin, I decided to use a special add-on piece of equipment from Davis specifically designed to be used for APRS – the WeatherLink APRS streaming data logger. The data logger, once configured, streams weather data directly to a TNC, eliminating the need for a computer (or UI-View32). With this setup, it was not necessary to leave a computer running to keep the weather station pushing data to the TNC and VHF radio. The weather data is formated by the data logger to be ready for transmission into APRS. The station also has a laptop which I installed the WeatherLink software that would allow me to configure the APRS data logger. Configuring the data logger was pretty straight forward. Setting the parameters in the TNC to grab the data loggers APRS weather info proved a bit more challenging. The challenge was further compounded by my forgetting to pack the 25 pin to 9 pin cable that connects the laptop to the Kantronics KPC-3+ TNC.
The real work started Friday. The first task was completing the installation of a Davis Vantage Pro2 weather station on the cabin roof. That was done without much trouble.

The next step would be to get the weather data out via APRS using the IC-208H paired with the Kantronics KPC-3+ TNC and the Davis APRS streaming data logger. With the lack of a good cable to use between the laptop and TNC as well as not knowing exactly what parameters were need in the TNC we decided that task would have to wait until after Field Day.
Now it was time to string some antennas. The first was a 132′ dipole which ran N/S. I’d packed my CVS19 Pneumatic Antenna Launcher (aka tennis ball launcher) which helped us position the antenna up about 40′.

Next we strung a G5RV going E/W. This is the same G5RV I bought from a fellow ham when I lived back in Virginia. He had never used it and I had used the antenna only once while running a special event station at Fort Monroe.
It quickly became apparent that we could not both operate using both antennas due to their proximity to each other and surrounding powerlines prevented us from placing the antennas end to end in order to minimize interference. The solution: my dad’s Force 12 Sigma 5. The problem: the antenna was back in San Jose. So Friday night consisted of my dad traveling back to the Bay Area to retrieve the vertical antenna while I continued to configure the laptop (N3FJP Field Day networked logging software, Digipan for PSK-31, and the Davis Weatherlink program) in addition to setting up my operating position on the back deck of the cabin.

My operating position setup consisted of a 10’x10′ pop-up shelter (with mosquito net) and a large table with comfortable folding chair. Inside the shelter I placed a large table with the eARSIB and my station’s laptop.
I verified that the laptops at either operating position (the one inside the cabin and mine outside on the deck) could communicate via WiFi using the N3FJP software: it worked like a charm. The software allows two (or more) operating positions to share one log. Each operator gets to see the combined log and is notified of potential dupes.
Saturday morning my dad arrived back from the Bay Area and we setup the Sigma 5.

My operating position on the deck had the antenna connections for both the G5RV and the Sigma 5, my dad’s position had the 132′ ladderline-fed dipole. Interference between the two positions was sometimes a problem. I could use the Sigma 5 vertical on 20M, 15M, and 10M as long as my dad stayed on 80M or 40M (as long as I wasn’t on 15M). While this slowed down operations a bit, it gave us time to take plenty of breaks. My dad started Field Day by working PSK-31 on 20M. I worked phone contacts on 15M and 10M. Later my dad switched to phone, which he really started to enjoy.
10M and 15M were really incredible. I was able to work all the way to the East Coast and up and down the West Coast. For dinner, I BBQ’d some brauts. By midnight we were both exhausted and decided to get some rest.
I enjoyed using my eARSIB. This is the first time I used a foot pedal for my PTT – paired with a Heil headset. That worked great, allowing me to use both hands on the keyboard. I had been unable to configure the West Mountain RIGtalk to work on my laptop – not sure why. But it wasn’t too hard to just flip the band in the logging software. I had not used my Logikey CMOS4 Keyer in some time. I paired it with my Vibroplex paddle and the two worked well together. I enjoyed a few QRS CW QSOs – thank you for those who took the time to slow down for me. I had picked up a marine battery to use with my PWRgate and that worked well.
Sunday I got up after four hours of sleep and started working 80M using the G5RV.
The G5RV worked nicely and I contacted stations from Western Canada down to Southern California and Arizona. I moved up to 40M and expierenced similar results – but was also able to work a station in Japan. My dad was up soon and started to work on 80M and 40M with the 132′ dipole while I switched to the vertical and worked stations on 20M. By about 11:30am we were both pretty much spent. Overall we made about 250 contacts, mostly phone but also a few PSK-31 and CW…. and we had a great time!
KD6EUG Brags About The Number of QSOs He Made
We slept well Sunday night and Monday morning had me back working on the Kantronics KPC-3+/Davis weather station. The biggest problem I was having was figuring out what value to use for the GPSHEAD parameter. Without the correct value, the KPC-3+ was not grabbing the weather data. GPSHEAD would pull in the data a place it in LT (a buffer). LPT setup the APRS path. BLT setup the amount of time in between the TNC initiating a beacon transmission containing weather data.

After a few calls to the Davis headquarters, I was able to figure out that “@” was the magic value for GPSHEAD. Now the weather station is up and operational.

It was then back on the road, up and over the Sonora Pass. I was able to talk to my dad, operating from the Mi-Wuk cabin station, on 80M from the top of the pass. I spent the night in Carson City, Nevada and the next day headed east on I-80. I had made the decision to take I-70 back to Kansas in order to try something different as well as seeing a part of Colorado I had never seen before. It was a long haul to Grand Junction, Colorado – I arrived around midnight. After a few hours of sleep, I was on the road again heading east through some of the most beautiful scenery of the trip. Aspen and Veil were beautiful cities – I hope I get a chance to go back there someday. But while the drive was scenic, the going was slowed and progress was not nearly as quick as I had experienced before while moving through Wyoming and Nebraska.

I finally emerged from the Rockies and headed into Denver, stopping at the Ham Radio Outlet located there. Terry, KC0VFO, and I talked about our Field Day experiences – he operated mobile. His call sign looked familiar and sure enough, I had worked Terry on 15M during Field Day.
Moving east through Denver I was back on the open road, moving rapidly along I-70. I heard a call coming over the 2M National Simplex frequency. It was a gentleman operating from the Mt. Evans Observatory – we had an enjoyable QSO and he went on to work others. The Canada Day contest was also underway and I started to hand out contacts from the mobile. I had planned to make it all the way back to Leavenworth, Kansas but realized I was too tired and needed to spend the night somewhere. I crossed the Colorado/Kansas border and arrived in Goodland, Kansas were I found a hotel room and promptly fell fast asleep.
My final day on the road was pretty easy driving. When you think about Kansas, it is usually what you see in western Kansas along I-70. Flat terrain, lots of farms, not much else. For some reason, the speed limit max in Kansas drops to 70mph (Nebraska, Wyoming, Nevada, Utah, and Colorado all have a max of 75mph). I listened to some of the morning HF nets on 80M and 40M, then made contact with K2L, a special events station in Charleston, South Carolina. I was also able to check into the Sparkle Net on 40M and then later worked two stations on 17M, both located in and around the western border area between North and South Carolina. Soon I was back home, arriving before 3pm.

Samuel Morse Killed The Pony Express
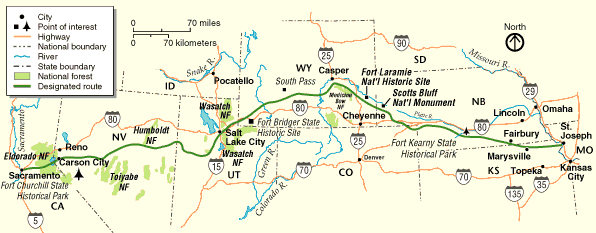
I am getting ready to head out for my road trip west. I recently got an opportunity to visit the Pony Express National Museum and am going to tailor my route west to follow (for the most part) the Pony Express route.
The Pony Express was a fast mail service crossing the North American continent from St. Joseph, Missouri, to Sacramento, California, from April 1860 to October 1861. It became the nation’s most direct means of east-west communication before the telegraph and was vital for tying California closely with the Union just before the American Civil War.
Once telegraph service was extended between Sacramento and Salt Lake City, the Pony Express was no longer viable as a money making operation. So in a way – Morse Code killed the Pony Express.
I am going to try to stop at some of the original Pony Express stops as well as other points of interest (like Fort Kearny, NE).
For those interested in following my progress west from the Missouri River to the California Sierra Nevada, I will be using APRS. I will also be looking for HF contacts to keep me entertained on the drive, so keep an ear out for me on 40M and 20M.
Departure time is set for early Tuesday morning. Tomorrow I need to pack.
On The Road Again!
It was good to get back behind the wheel of my 2005 Toyota Tundra – although can’t say I am excited about paying to fuel it up. I’ve attempted to get a good HF install for mobile operations before experiencing limited success… with perhaps my biggest rookie mistake being an attempt to use the ICOM AT-180 autotuner along with my IC-706MKIIG.
I used Hamsticks and Hustler mono band resonators – it worked pretty well but I got tired of having to exit the vehicle every time I wanted to change bands.
My answer was to install a screwdriver antenna. I’d been planning this mobile install for some time, using lessons from my trials in the Spring of 2007 as well as a significant amount of reading and research (eHam, WorldRadio, CQ Magazine, websites). I decided on basing my mobile install around the Tarheel Model 75 “Stubby” providing continuous coverage from 3.7 to 34 MHz. The folks at Tarheel worked with me to get me going – responsive to my emails and questions.
The radio for this mobile install: my ICOM IC-706MKIIG. I’d originally purchased this radio when I arrived in Hampton back in the early Summer of 2005. The purchase was in part to motivate me to upgrade from Tech to General – which it did. That Summer I passed the written exam (Element 3) at a nearby hamfest for General. But I was not yet ready for the Morse (Element 1). It wasn’t until later that Fall that I was ready for the Morse… and barely passed too. I’ve been very pleased with the IC-706MKIIG; it is a great radio for a beginner, easy to operate, solid performance, flexible to use either in the radio shack, portable, or mobile.
To mount the antenna to my Toyota Tundra, I really did not want to permanently mar the exterior of the truck. I’d admired K4GUN’s install and thought his implementation of using the Geotool stake pocket on the bed of the truck was brilliant. I wrote Steve, K4GUN, concerning his install and he provided some great additional information concerning the challenges of the stake pocket mount. After working with Rick, WA6JKH, to ensure I was ordering the proper mount, I placed my order and Rick gave me a nice active duty military discount.
I decided to get N2VZ’s Turbo Tuner for ease of operation. Operating HF while driving is already complicated enough and I wanted to make tuning the antenna as easy as possible. Bill was very responsive and also provided a military discount.
I had ordered all the equipment while in Iraq, so everything was waiting for me when I arrived home.
The install took two days. Perhaps the hardest part was mounting the IC-706MKIIG under the passenger’s seat. Already installed under the seat was my ICOM IC-208H – my trusty VHF/UHF rig. I’d originally installed this rig during my circumnavigation of the continental US back in 2005. During that install, I only partially removed the passenger’s seat. This time I pulled the seat completely out of the truck which greatly helped me successfully position both the IC-208H and the IC-706MKIIG in the limited space.
Routing the feedline from the rig to the stake pocket mount was fairly easy, making use of the rubber grommet directly under the passenger’s seat and zip ties along the feedline’s path to the rear of the truck. Soldering the connections to the stake pocket mount was straight forward but it was a bit tricky feeding the line up through the bottom of the stake pocket.
Setup of the Turbo Tuner was a snap; I followed the provided instructions step-by-step, making sure I had the DIP switches positioned properly.
Mounting the antenna onto the Geotool stake pocket mount was made easier by using the HI-Q’s Giant Quick Disconnect. Payment was via PayPal and Charlie, W6HIQ, had it on my doorstep within the week. Thanks Charlie!
How does it work? So far, so good. More reports from the road are coming… and maybe a picture or two.
Mobile Intermittent Power Failure Fixed
There was something wrong with the power connection on the back of the IC-706MKIIG. Power would sometimes cut in an out, usually when I was driving over bumpy roads. I pulled the cable off and noticed that the pins were bent out of shape. The pins in the connector (cup shaped) were spread too far out and were not making solid contact with the pins on the back of the radio. I had replacement pins, so I yanked each of the old pins from the connector (no easy doing) and soldered on the new pins, slid them into the connector, used the tip of a pair of needle nose pliers to lock them into place. I placed the the power connector back on the rig in the truck and it works great!


