The Day The Computer Died (aka dialout)

I have been using small footprint computers in ham shack for a while. It started with the Dell Zino. Always a bit under powered, but enough to get the hamming done. The latest computer driving everything was one of those barebones models that was the size of a shoe box. The first sign of decline was when the fan kept getting louder and LOUDER. The the drive (500GBs of SATA) then decided to give up the ghost.

An immediate lesson learned… back up my log. I have been good at uploading my logs (almost daily, when on the air) to LOTW, QRZ.com, and eQSL. But I would only export that days contacts, consistently replacing the previous days exported log.

I choose not to abandon the small footprint computer and went back to the Shuttle. Newegg.org was my one stop shopping:

The case and motherboard: Shuttle XH81 Intel Core i7 / i5 / i3 / Pentium / Celeron 65W Intel H81 1 x HDMI Barebone system
– small form factor, fits neatly underneath monitor.
– 2x RS-232 connections on the back. Perfect for connecting to the Elecraft amp and tuner.
– Plenty of USB connections

Intel Core i7-4770S Haswell Quad-Core 3.1 GHz LGA 1150 65W BX80646I74770S Desktop Processor Intel HD Graphics
– not the fastest, but fast enough.
– comes with a super quiet fan.

Transcend JetRam 8GB 204-Pin DDR3 SO-DIMM DDR3 1600 (PC3 12800) Laptop Memory Model JM1600KSH-8G
– I got two DIMMs to keep things moving… 16GBs = snappy!

SAMSUNG 850 EVO 2.5″ 250GB SATA III 3-D Vertical Internal Solid State Drive (SSD) MZ-75E250B/AM
– Good bye disk, hello solid state. Faster. Silent.

The actual build was plug and play. The Shuttle line has come a long way since my last experience with their product. I think these specific computers are designed to operate older types of technology (hint…. 2x RS-232 connections?) which works great with most amateur radio needs.

The next step was loading the OS. LiLi USB Creator is my go to solution for installing linux when I don’t have an optical drive (which is more often the case). This allows you to load the OS through booting directly from the USB stick.

The linux flavor of the day: Mint with the MATE edition. I was an Ubuntu man until Unity. Then made the jump to Mint. The OS loaded without issue and I was off and running.

Amazingly enough, I was able to install TQSL-2.2. In the past, I have been able to install TQSL from the Software Manager. But this has been an older version of TQSL. The newer versions ALWAYS gave my problems with dependency issues during attempted installs. I stayed with it this time and finally got it working. Phew!

The install of fldigi went smoothe, but configuring it to work with my Elecraft K3 was giving me fits. In my past setup, I’ve always used hamlib for rig control and the trick was just finding which USB number was being used for my USB Microham III. But this time, the USB Microham III was identified by name as a choice. Great! But it didn’t initialize. I tried USB0 (…. nothing), combed over the results of lsusb…. not… working. After some intense Googling, I ran across a command I had never seen before:

sudo adduser [username] dialout

Dialout!? Who knew? But that did the trick.

Now, here is something funny. We all have our junk boxes. As hams, we are pack rats. We hang on to stuff that has no current use, but may someday. I had a box RS-232 cables. When Fall Cleaning swept through the ham shack, I looked at the RS-232 cables. I am really going to need 15 RS-232 cables ranging in length between two and 15 feet? The box headed to the dump.

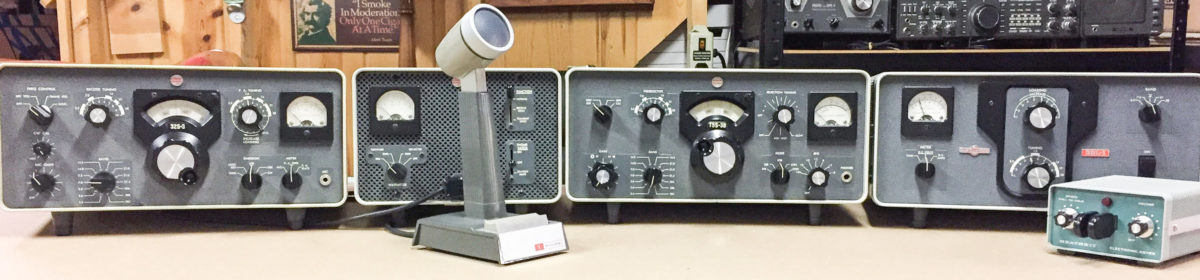
Now, with my growing K-Line, I can use Elecraft software (linux versions available) to monitor data from the amp and tuner. But the connections are serial. SERIAL. I turned the ham shack upside down and not an RS-232 cable to be found. I really don’t want to have to actually go out and BUY a serial cable.

Send these commands to UI-VIEW as a message

I’ve been having fun using my TH-D7A with the UI-View32 setup at the home QTH. The commands below allow me to send a message from my TH-D7A back to my home rig and get a specified response:

?APRSP – sends back a location beacon.
?APRSS – sends back the status text.
?APRSO – sends back your active objects.
?APRSD – sends back a list of stations that have been heard direct.
?APRST (or ?PING?) – sends back the route by which the query was received.
?APRSH – sends back information on when was last heard.
?VER? (not an APRS query, but some APRS software supports it) – sends back information on the software version in use.

With “Remote commands” enabled in UI-VIEW, you can send the following commands that are specific to UI-VIEW

QAS – causes your system (the Ui-VIEW station) to Query All Stations.
QWS – causes your system (the Ui-VIEW station)to Query WX Stations.
BCN – causes your system (the Ui-VIEW station)to send a beacon.
LGS (or LG1) – enables logging at (the Ui-VIEW station),
using a log file named according to the date.
(This command must come from the station callsign.)
LGX (or LG0) – disables logging at (the Ui-VIEW station). (This
command must come from the station callsign.)
DX – causes your system (the Ui-VIEW station) to send an abbreviated best DX report.
!program – when sent to (the Ui-VIEW station) runs a program in the RCOMMAND directory

TM-D710A and UI-View32


I was able to interface my TM-D710A with UI-View32. Previously I was using UI-View32 along with a Kantronics KPC-3+ and a dedicated FM rig (FT-1500) with a direct packet connection. This set up worked well – UI-View32 puts the KPC-3+ into KISS mode and the rest of the settings are pretty straight forward. The advantage of using the TM-D710A (one of many) is that with its two radios in one I can run my APRS station and also get on the local repeaters while only using my one VHF/UHF antenna.

I use Weather Display in conjunction with my Davis Vantage Pro2. Weather Display is an amazingly powerful application and it works well with UI-View32, allowing my APRS station to transmit my weather data in addition to my position info.
Configuring TM-D710A and UI-View32 to work together is little more tricky.
The TM-D710A has a built-in TNC. When you use the TM-D710A in a mobile configuration, the TNC runs in APRS mode. When used with UI-View32, the TNC operates in standard packet mode. It looks like it is possible to use the TNC in KISS mode, but I am not sure how to do that with UI-View32. The directions from Kenwood for the TM-D710A include a recommended CMD file to be used with UI-View32. I used the recommended CMD file and UI-View32 and the TM-D710A worked together up to a point. What was missing were two TNC commands that allow UI-View32 to see the received APRS traffic and then display the traffic on the UI-View32 map. Here is what the CMD file looks like now:

;This is a sample TNC initialization file for use with
;the Kenwood TM-D710A.

[SETUP]
;DON’T alter anything in this section unless you are
;sure you know what you are doing!
COMMAND_PROMPT=cmd:
COMMAND_CHARACTER_CODE=3
ESCAPE_CHARACTER_CODE=
CONV_COMMAND=CONV
MYCALL_COMMAND=”MYCALL ”
UNPROTO_COMMAND=”UNPROTO ”
NO_BEACON_COMMAND=BEACON EVERY 0

[INIT_COMMANDS]
^C^C^C
;Control mode on.
TC 1!TS 1
;Select TNC PKT mode on A band.
TN 2,0!TN 2,0
;Waiting for command prompt.
^M!cmd:!5
;Repeating the first two commands is not an error!
ECHO OFF
BEACON EVERY 0
ECHO OFF
BEACON EVERY 0
;Also UI-View32 to see incoming APRS traffic
MON ON
MCOM ON

AEN5AC

During my deployment to Iraq, I wanted to setup and operate a MARS station. I know that MARS is not nearly as well used by deployed soldiers as it once was to send MARSGrams and use phone patches to talk to family back home. Access to the internet and AT&T Call Centers now enable most soldiers to stay in touch. However, it is always good planning to have a back up for communications – and a MARS station provides that. I have been through initial MARS training back in Virginia, completing the basic course and participating in local nets. It was good to get that training because it provided me a better understanding of how MARS functions and well as educating me on basic net procedures. MARS nets are generally not procedurally similar to how military voice radio communications function today. It was good to be familiar with the differences.

Applying for a MARS callsign to operate in Iraq is straight forward. I contacted Mr. Daniel Wolff, AEM1WF, in Germany. Mr. Wolff processed my application and assigned me my MARS callsign as well as provided me with the regional net plans and basic MARS information for operating in the region.

For a station setup, I am using an ICOM IC-7000. The rig is a reasonably priced, full-featured radio with a modest size that lends itself to portable operations.

The primary means of moving MARS traffic in the region is digital, specifically Pactor using the WL2K/Airmail PMBO (Participating Mail Box Office) backbone. To add a Pactor capability to my station I initially chose the Kantronics KAM XL. Although this TNC is only capable of Pactor 1, it can do the job.

I wanted flexibility for the power system. We our currently on the Iraqi power grid which is 240V. At some point my team may relocate to a US-controlled area where the power source could possibly be 120V. I needed a power supply that was capable of using both a 120V or 240V electrical source – the Astron SS-30M suited this requirement nicely. For power distribution, I am using a RIGrunner which uses the Anderson Powerpole connectors. I’ve had past success using Anderson Powerpoles; they provide flexibility of operation and a dependable connection. The power grid here is up and down – I needed a battery backup to provide sustainable power during the brief outages. The solution was an 18Ah battery tied in through West Mountain Radio’s PWRgate. The PWRgate automatically transitions from the Astron SS-30M power supply to the backup battery should shore power fail and does so without a drop of supplied amps. I’ve been in the middle of a connection with the regional WL2K/PMBO when the power grid dropped and the PWRgate kept my the power coming without interruption.

I wanted a simple, efficient antenna that provided coverage from 80M to 10M with a modest footprint and that I could deploy with minimal assistance. A 130′ inverted vee was the solution. I am fortunate to be at a location where our one-story building has a high 20′ ceiling. There was also an unused 30′ OE-254 mast already emplaced on top of the roof that I could use to support the center point of the vee. Some more scrounging around the camp rewarded me with additional support polls that I used to get both ends of the vee 35′ off the ground. The building and surrounding structures allowed me to orient the antenna NE/SW, leaving the sides to face NW towards AEM1US in Germany and SE to AEN5QT in Qatar – the two nearest PMBOs. I used ladderline from the center point down to a 4:1 balun and into the LDG AT-200pro antenna tuner.

Installing Airmail (version 3.3.081) on my PC was straight forward with good directions provided by “Airmail for WL2K MARS_Basic Training. PDF” and additional help from the Yahoo Group. The KAM XL TNC (version 1.07050) is supported by Airmail and configures all the Airmail software settings for you. I did a hard reset on KAM XL then configured the KAM XL’s XMITLVL setting via Airmail’s Tools>Dumb Terminal. I used the CAL command and then the T command (send square wave) to create a signal into the IC-7000. I incrementally increased the XMITLVL value until I peaked the IC-7000’s ALC meter into the red. I then backed the XMITLVL setting down one. I make slight adjustments of the XMITLVL depending on the band I am operating on.

With Airmail, connecting to a PMBO is relatively easy. Bringing up the HF Module and selecting Mode>Monitoring Enabled allows you to see all communications between the PC and the modem.

Once you select Mode>Monitoring Enabled you’ll see:
cmd= MON ON/OFF
reply=MONITOR was OFF/OFF

Close the HF Module window and then go back to Airmail and select the HF Module again.

This time when the HF Module is stared, Airmail connects to the KAM XL and makes the following setting adjustments (which you can see because “Monitoring Enabled” is ON):

2007/MM/DD HH:MM:SS KAM-XL modem initialized OK
cmd= XFLOW OFF
reply=XFLOW was OFF
cmd= ECHO ON
reply=ECHO was ON
cmd= XMITECHO ON
reply=XMITECHO was ON
cmd= TXFLOW OFF
reply=TXFLOW was OFF
cmd= XFLOW OFF
reply=XFLOW was OFF
cmd= TRFLOW OFF
reply=TRFLOW was OFF
cmd= AUTOCR 0
reply=AUTOCR was 0
cmd= AUTOLF OFF
reply=AUTOLF was OFF
cmd= CRADD OFF
reply=CRADD was OFF
cmd= MAXUSERS 10/10
reply=MAXUSERS was 10/10
cmd= CRSUP OFF/OFF
reply=CRSUP was OFF/OFF
cmd= LFADD OFF/OFF
reply=LFADD was OFF/OFF
cmd= LFSUP OFF/OFF
reply=LFSUP was OFF/OFF
cmd= ARQID 0
reply=ARQID was 0
cmd= ARQBBS OFF
reply=ARQBBS was OFF
cmd= PTHUFF ON
reply=PTHUFF was ON
cmd= SHIFT MODEM
reply=SHIFT was MODEM
cmd= SPACE 3000
reply=SPACE was 1600
cmd= MARK 1400
reply=MARK was 1400
cmd= SPACE 1600
reply=SPACE was 3000
cmd= INV ON
reply=INVERT was OFF
cmd= MYPT AEN5AC
reply=ok
cmd= MON OFF/OFF
reply=MONITOR was OFF/OFF
cmd= PACTOR
reply=ok
cmd= MYPT AEN5AC
reply=ok

Next, select the callsign of the PMBO you are trying to reach. Combined with the integrated ITS HF Propagation software, it is easy to select the best frequency to attempt a connection. Airmail has the ability to control your rig directly and adjust the proper frequency and mode prior to transmitting. Adjustments can also be made manually by using the dial frequency/mode being displayed in the lower right corner of the HF Module window.

When trying to connect, Airmail will make several 1 to 2 second transmissions attempting to raise the distant PMBO. I adjusted the IC-7000s MONITOR function to allow me to hear and confirm that the data is being transmitted. The following is displayed in Airmail’s HF Module window when you initiate a connection:

2007/MM/DD HH:MM:SS Calling (PMBO’s callsign)

cmd=PACTOR (PMBO’s callsign)
reply=ok

Upon connecting, something like the following appears in the HF Module window:

2007/MM/DD HH:MM:SS Connected to (PMBO’s callsign)
(LINKED TO (PMBO’s callsign))
1AEN5AC (This is your callsign)
(Pactor1: )
[WL2K-2.1.8-B2FHIMT$]
Welcome to…. (info concerning this PMBO you connected to)

The Following are a list of frequencies that this PMBO scans.
Please note that not all these frequencies can be used from all locations.
Please consult your Netplan for proper usage in your area.

(PMBO’s callsign) last contacted the Central server 1 min ago.

AEN5AC de (PMBO’s callsign) QTC 0 Msgs 0 bytes>
[AirMail-3.3.081-B2FHIM$]
; (PMBO’s callsign) de AEN5AC
FF
(PACTOR STANDBY)
2007/MM/DD HH:MM:SS Disconnected from (PMBO’s callsign)

Airmail uploads outgoing mail before it downloads incoming mail – the process is automatic.

Despite heavy QRM and QRN, Pactor is able to get through with just a 100 watts. Pactor 1 has a slow data rate, but can get simple text emails through quickly. I have recently upgraded the TNC to an SCS PTC-IIusb Modem with Pactor 3 capability. The PTC-IIusb provides a more stable connection and better data rate transfer.

Future plans for the station include mounting everything in a road case for easy portability.